

Emergency lights are critical for safety during power outages or crises․ This guide helps identify and resolve common issues like flickering LEDs, wiring problems, and battery failures, ensuring reliability and safety․
1․1 Importance of Functional Emergency Lighting
Functional emergency lighting is essential for safety and legal compliance․ It ensures visibility during power outages, helping people evacuate safely and preventing accidents․ Non-functional lights can lead to injuries, liabilities, and non-compliance with safety regulations․ Regular maintenance and troubleshooting are crucial to uphold reliability․ Emergency lights must meet standards like AS/NZS 2293․2:2018, requiring a 90-minute battery backup․ Failing to address issues like flickering LEDs or battery degradation can compromise safety․ Properly functioning emergency lights are vital for protecting lives and property during crises․ Ensuring they work correctly is a legal and moral responsibility, especially in public spaces and workplaces․
1․2 Common Issues in Emergency Lights
Common issues in emergency lights include battery degradation, wiring faults, and flickering LEDs․ Batteries lose capacity over time, failing to provide the required 90-minute backup․ Wiring problems, such as loose connections or frayed wires, can disrupt power supply․ Flickering LEDs often result from loose bulb connections or faulty drivers․ Physical damage to batteries or enclosures can also cause malfunctions․ Additionally, lack of maintenance exacerbates these problems․ Identifying and addressing these issues promptly is crucial for ensuring reliability and safety․ Regular inspections and timely replacements are key to maintaining functionality and avoiding potential hazards during emergencies․

Battery-Related Issues in LED Emergency Lights
Batteries are a primary concern in LED emergency lights․ Degradation over time reduces charge capacity, while physical damage or failure can cause complete system malfunctions, ensuring safety risks․
2․1 Battery Degradation Over Time
Battery degradation is a common issue in LED emergency lights, as batteries naturally lose their ability to hold a full charge over time․ This gradual decline can reduce the system’s reliability, especially during prolonged power outages․ Factors such as age, usage, and environmental conditions can accelerate this degradation․ Regular maintenance is essential to identify and address these issues before they lead to system failures․ Ignoring battery degradation can result in the lights failing to meet safety standards, such as providing 90 minutes of backup power as required by regulations like AS/NZS 2293․2:2018․ Monitoring battery health ensures consistent performance and safety during emergencies․
2․2 Battery Failure and Replacement
Battery failure is one of the most common causes of emergency light malfunctions․ Over time, batteries lose their capacity to hold a full charge, leading to insufficient power during outages․ Deep discharging or improper charging can accelerate this process․ When a battery fails, it prevents the light from functioning as required, posing a safety risk․ Replacement is often the only solution, especially if the battery is no longer capable of meeting the 90-minute runtime standard․ Always use compatible replacements and test the system after installation to ensure proper operation․ Regularly replacing batteries can prevent unexpected failures and maintain reliability during emergencies․
2․3 Testing Battery Charge Capacity
Testing the charge capacity of emergency light batteries is crucial to ensure reliability․ Over time, batteries degrade, reducing their ability to power lights for the required 90 minutes․ To test, discharge the battery completely and measure how long it takes to recharge․ A fully charged battery should hold a voltage of around 12V for most systems; If it falls below this or doesn’t recharge properly, replacement is necessary․ Use a multimeter to check voltage levels and ensure the battery meets safety standards․ Regular testing helps prevent unexpected failures and ensures compliance with regulations like AS/NZS 2293․2:2018, maintaining safety during emergencies․
2․4 Signs of Physical Damage to Batteries

Physical damage to emergency light batteries can lead to sudden failures․ Look for signs like cracks in the casing, swelling, or leaks, which indicate internal damage․ Corrosion on terminals or connectors is another red flag, as it disrupts connectivity․ Impact damage, such as dents or misshapen enclosures, can compromise the battery’s integrity․ If the battery feels unusually light or emits a strange odor, it may be damaged internally․ Always inspect for these signs during maintenance to prevent unexpected outages․ Replace damaged batteries promptly to ensure reliable performance and safety during emergencies․

Wiring Issues in Emergency Lights
Wiring problems are common in emergency lights, often caused by frayed wires, loose connections, or corrosion․ These issues can lead to malfunctions, requiring immediate inspection and repair․
3․1 Inspecting Wiring Connections
Inspecting wiring connections is crucial for identifying issues in emergency lights․ Look for frayed wires, loose screws, or corroded terminals․ Ensure all connections between the battery, charging circuit, and light are secure․ Use a multimeter to check for continuity and voltage drops․ If any wires are damaged, replace them immediately to prevent further complications․ Regular inspections can prevent unexpected failures, ensuring the system operates reliably during emergencies․ Always disconnect power before handling internal components to avoid electrical shock․ Properly secured and maintained wiring ensures optimal performance and safety․
3․2 Diagnosing Faulty or Frayed Wires
Diagnosing faulty or frayed wires is essential for maintaining emergency light functionality․ Begin by visually inspecting wires for signs of wear, such as fraying or discoloration․ Use a multimeter to test for continuity and identify breaks or shorts․ If a wire is damaged, it may cause intermittent power issues or complete system failure․ Replace frayed wires with properly insulated ones of the correct gauge to prevent overheating․ Ensure all connections are secure and free from corrosion․ Regularly checking wiring can prevent unexpected malfunctions, ensuring reliable operation during emergencies․ Faulty wiring is a common yet addressable issue that should never be overlooked․

Flickering LEDs in Emergency Lights
Flickering LEDs in emergency lights often result from loose connections, battery issues, or faulty drivers․ Addressing these problems is essential for maintaining reliable safety illumination during crises․
4․1 Common Causes of Flickering
Flickering in emergency lights is often caused by loose bulb or LED connections, battery degradation, or faulty wiring․ Additionally, issues with the power supply, such as a failing transformer or driver, can also lead to flickering․ Over time, battery capacity diminishes, reducing the ability to maintain consistent power, which may result in intermittent illumination․ Another common issue is frayed or corroded wires, which disrupt the electrical flow․ Identifying these root causes is crucial for resolving the problem effectively․ Regular maintenance and inspections can help prevent flickering and ensure reliable operation during emergencies․
4․2 Solutions for Flickering LEDs
To address flickering LEDs, start by checking and tightening any loose connections in the wiring or bulb sockets․ Replace frayed or damaged wires to ensure stable electrical flow․ If battery degradation is the cause, consider replacing the battery with a new one of the correct specifications․ Additionally, inspect the power supply components, such as the transformer or driver, and replace them if necessary․ Regular maintenance, including cleaning connections and testing battery charge capacity, can prevent future issues․ Ensuring all components are secure and functioning properly will help eliminate flickering and restore reliable operation of your emergency lights․

Maintenance and Upkeep of Emergency Lights
Regular inspections ensure emergency lights function properly․ Check connections, inspect batteries, and replace worn components․ Scheduled maintenance helps prevent failures and guarantees reliable operation during emergencies․
5․1 Scheduled Maintenance Checks
Regular maintenance is essential to ensure emergency lights function reliably; Monthly inspections should include checking battery charge levels, inspecting wiring for damage, and testing LED functionality․ Annual checks involve replacing batteries, cleaning light fixtures, and verifying that all components meet safety standards․ Scheduled maintenance helps identify issues like battery degradation or loose connections before they cause failures․ Testing under simulated outage conditions ensures the system operates as intended․ By following a structured maintenance plan, you can prevent unexpected malfunctions and guarantee that emergency lights provide consistent, reliable illumination during critical situations, ensuring safety and compliance with regulations․
5․2 Best Practices for Extending Lifespan
To extend the lifespan of emergency lights, proper storage and usage are crucial․ Avoid exposing units to extreme temperatures or moisture, as this can degrade components․ Replace batteries every 5-6 years, even if they seem functional, to prevent unexpected failures․ Regularly clean light fixtures to maintain optimal brightness and check connections to ensure they are secure․ Using high-quality components and following manufacturer guidelines can significantly prolong system reliability․ Additionally, consider implementing light sticks as a backup solution to reduce strain on primary lighting systems․ By adhering to these practices, you can maximize the durability and performance of your emergency lights, ensuring consistent safety and reliability over time․

Light Sticks as a Solution
Light sticks are reliable alternatives to traditional emergency lights, developed for quick, efficient illumination without batteries or wiring․ Easy to use, ideal for emergency responses and military use․
6․1 Development and Purpose of Light Sticks
Light sticks, also known as chemiluminescent lights, were developed in the 1960s through a collaboration with the U․S․ Navy․ Their purpose is to provide a reliable, portable, and instant lighting solution for emergency situations․ Unlike traditional emergency lights, light sticks do not require batteries, wiring, or maintenance, making them ideal for use in harsh environments․ They operate through a chemical reaction that produces light when the internal glass vial is broken, ensuring consistent illumination for several hours․ This innovation addresses common issues like battery failure and wiring problems, offering a simple yet effective alternative for emergency lighting needs․
6․2 How Light Sticks Address Common Issues
Light sticks effectively address common emergency lighting challenges by eliminating dependency on batteries, wiring, and electrical components․ Their chemiluminescent technology ensures reliability without the risk of battery degradation or wiring faults․ Unlike LED systems, light sticks require no maintenance or charging, reducing downtime and simplifying logistics․ They are also immune to issues like flickering or bulb replacements, providing consistent illumination․ This makes them ideal for situations where traditional emergency lights may fail, offering a durable, low-maintenance solution that enhances safety and preparedness in critical scenarios․ Their simplicity and effectiveness make light sticks a preferred alternative for addressing recurring emergency lighting problems․

Testing and Diagnostics
Testing and diagnostics are crucial for identifying issues in emergency lights․ Use a test light to check AC power presence and inspect transformers or power supply boards for faults․

7․1 Using a Test Light for AC Power Issues
A test light is an essential tool for diagnosing AC power issues in emergency lights․ Begin by turning off the power supply and connecting the test light to the AC circuit․ If the light illuminates, AC power is present and functioning correctly․ If it doesn’t light up, there may be a break in the wiring or a tripped circuit breaker․ This simple yet effective method helps pinpoint where the issue lies, whether it’s a faulty connection, a blown fuse, or a malfunctioning transformer․ Regular use of a test light ensures quick and accurate troubleshooting, minimizing downtime and enhancing safety․
7․2 Identifying Transformer or Power Supply Problems
Transformer or power supply issues often arise due to overheating, overload, or internal component failure․ Check for visible signs of damage, such as burn marks or unusual odors․ Use a multimeter to measure the output voltage, ensuring it matches the specified rating․ If the voltage is inconsistent, the transformer may be faulty․ Additionally, listen for unusual noises, as humming or buzzing could indicate a failing component․ Regular inspections and voltage tests help detect problems early, preventing complete system failure․ Replacing a faulty transformer or power supply promptly ensures emergency lights function reliably during critical situations․ Always refer to the manufacturer’s guidelines for accurate diagnostics․
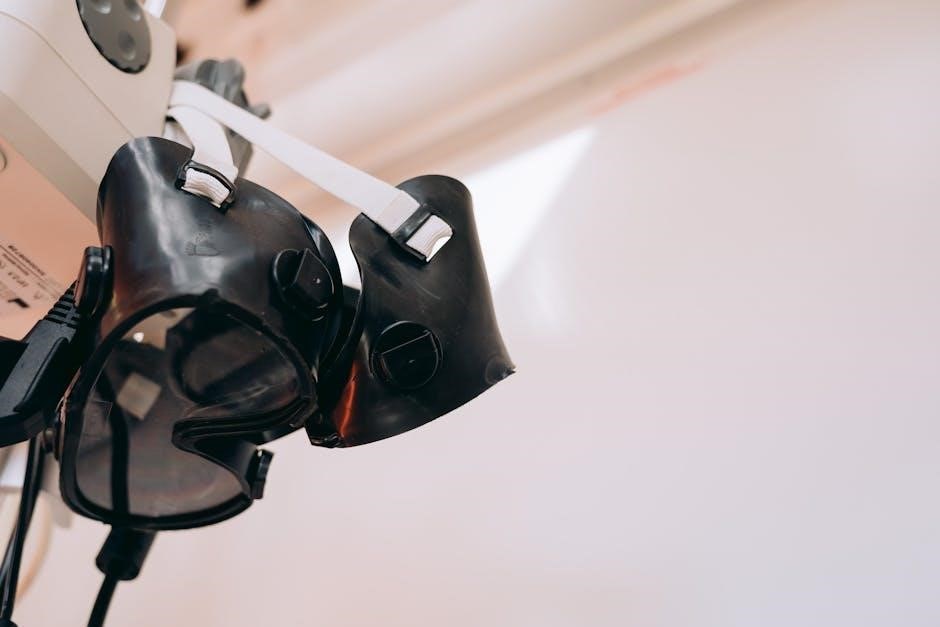
Loose Connections and Bulb Replacement
Loose connections and faulty bulbs are common issues in emergency lights․ Regularly inspect and tighten all connections to ensure proper function․ Replace dim or damaged bulbs promptly․
8․1 Checking for Loose LED or Bulb Connections
Loose connections are a frequent cause of emergency light malfunctions․ To identify issues, inspect all bulbs and LEDs for secure fittings․ Gently tug on connections to ensure they’re tight․ If a bulb is loose, tighten it firmly․ For LEDs, check that all contacts are clean and free from corrosion․ Use a multimeter to verify continuity if unsure․ Loose connections can lead to intermittent operation or complete failure, posing safety risks․ Regularly checking and securing these connections helps maintain reliability and ensures your emergency lights function when needed most․
8․2 Replacing Faulty Bulbs or LEDs
Faulty bulbs or LEDs are common issues that can cause emergency lights to malfunction․ If a bulb or LED is damaged, it must be replaced promptly․ Start by turning off the power supply to the unit․ Remove the faulty bulb or LED, ensuring compatibility with the replacement․ For LEDs, check the manufacturer’s specifications for the correct type․ Securely install the new bulb or LED, tightening any screws or connectors․ Turn the power back on and test the light to ensure proper operation․ Regular replacement of worn-out components prevents failures during emergencies, ensuring reliable performance when needed most․ Always follow safety guidelines during replacement․
Effective emergency light troubleshooting ensures safety and reliability during critical situations․ By addressing issues like flickering LEDs, battery degradation, and wiring problems, you can maintain optimal performance․ Regular maintenance, timely replacements, and understanding common causes of malfunctions are key․ Utilizing tools like test lights and adhering to safety guidelines further enhance troubleshooting efforts․ Remember, functional emergency lighting is not just a convenience—it’s a vital safety measure․ Stay proactive and prepared to handle any issues swiftly, ensuring your emergency lights are always ready when needed․ A well-maintained system provides peace of mind and guarantees reliability in emergencies․ Prioritize these steps for continuous safety and efficiency․