
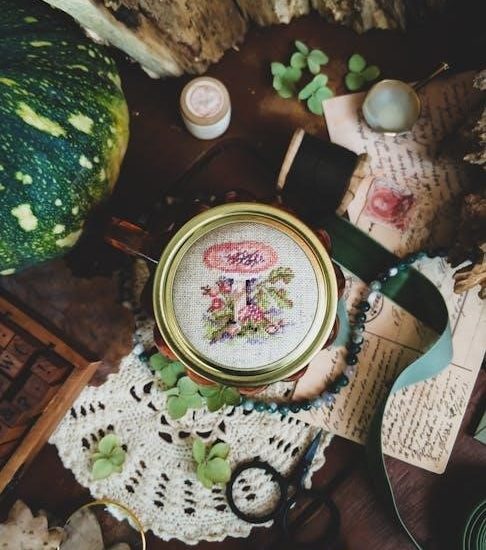
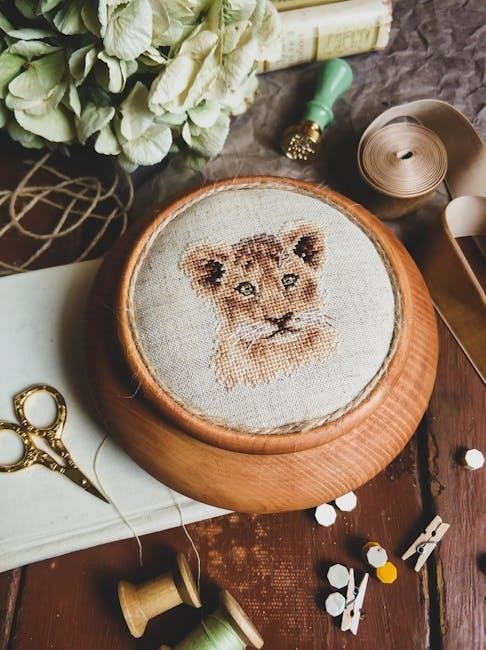
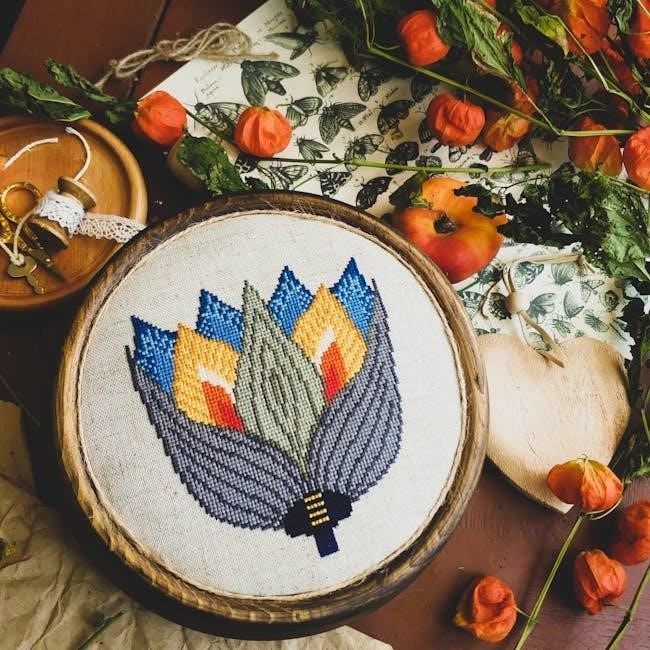
Counted cross stitch, a timeless craft, beautifully blends needlework and design. Resources from 1981 and 1986 showcase patterns for stoles and diverse designs.
What is Counted Cross Stitch?
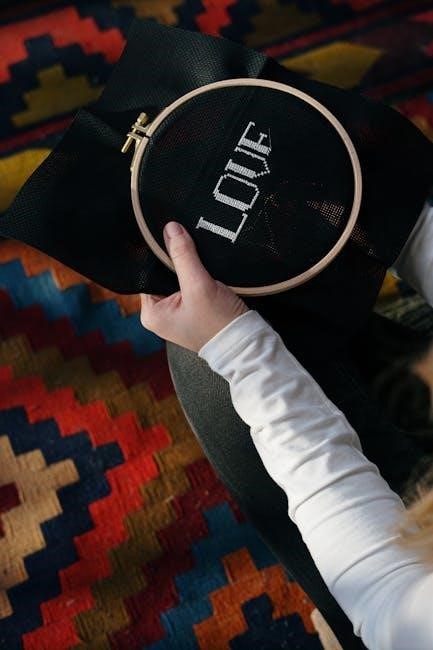
Counted cross stitch is a form of embroidery where X-shaped stitches are created on evenweave fabric, meticulously counted to form a picture. Unlike freestyle embroidery, each stitch precisely covers one square of the fabric, relying on the fabric’s grid for accuracy.
Historical resources, like patterns published in 1986 for ecclesiastical items such as stoles, demonstrate its long-standing tradition. The craft involves using embroidery floss, typically DMC or Anchor, to create designs.
Patterns, found in books dating back to 1981, provide charts indicating stitch placement; It’s a relaxing and rewarding hobby, yielding beautiful, detailed artwork.
History of Counted Cross Stitch
Counted cross stitch boasts a rich history, evolving from ancient needlework traditions. While pinpointing its exact origins is difficult, similar techniques existed centuries ago, used for embellishing textiles;
Patterns for religious items, like stoles documented in 1986 publications, suggest a strong historical connection to ecclesiastical embroidery. The craft gained popularity throughout Europe, becoming a common pastime.
By the 19th century, cross stitch was widely practiced, with designs becoming more intricate. Resources from 1981 showcase the continued evolution of patterns and designs, demonstrating its enduring appeal.
Materials Needed for Counted Cross Stitch
Embarking on a counted cross stitch project requires a few essential materials. Firstly, you’ll need Aida cloth or evenweave fabric, forming the foundation of your design. Embroidery floss, such as DMC or Anchor, provides the colorful threads.
A needle with a large eye is crucial for threading the floss. A pattern, whether from a book (like those published in 1981 and 1986) or online, guides your stitches. Scissors, a hoop, and a threader complete the basic toolkit.
Understanding Cross Stitch Patterns
Cross stitch patterns, found in resources dating back to 1981, utilize symbols representing stitches. Deciphering these keys unlocks beautiful designs, like those for ecclesiastical stoles.
Types of Cross Stitch Charts
Cross stitch charts come in various formats, catering to different preferences and skill levels. Historically, patterns – as seen in publications from 1981 and 1986 focusing on stoles – were often printed on paper, requiring careful marking as stitches were completed.
Today, digital charts are increasingly popular, offering zoom functionality and color options. These can be viewed on tablets or printed. Another type is the kit, which includes the pattern, fabric, threads, and needle.
Finally, some patterns are gridded, while others use a more pictorial representation. Understanding these distinctions helps you choose a chart suited to your needs and experience.
Reading a Cross Stitch Pattern Key
Decoding a cross stitch pattern key is crucial for successful stitching. The key acts as a legend, translating symbols on the chart into specific thread colors. Historically, patterns for items like stoles (documented in 1986 publications) relied on clear symbol-to-color correspondence.
Modern charts often use a numbered or alphabetized key, referencing a corresponding thread color code (like DMC or Anchor). Symbols represent individual stitches; a full square signifies a complete cross stitch. Half stitches, backstitches, and other elements have unique symbols too.
Carefully referencing the key ensures accurate color placement and design reproduction.
Fabric Count and Stitch Size
Fabric count significantly impacts the final size and detail of your cross stitch project. Count refers to the number of squares per inch. Lower counts (like 14-count Aida) create larger stitches and a quicker finish, ideal for beginners. Higher counts (16, 18, or even 22) yield smaller, more detailed stitches.
Stitch size is directly related to fabric count. On lower counts, each cross stitch covers a larger area. Patterns specify the recommended fabric count; deviating alters the design’s proportions. Historical patterns, like those for stoles, likely indicated a suitable count for the intended detail.

Basic Cross Stitch Techniques
Mastering the basic cross stitch is fundamental. Consistent tension and neat rows are key. Proper thread starting and ending techniques ensure a polished, durable finish.
The Basic Cross Stitch
The foundational stitch involves creating ‘X’ shapes on the fabric. Begin by bringing the needle up through one hole, then diagonally across to the opposite hole.
Next, descend through that second hole and emerge one space away, completing the first half of the ‘X’. Continue by crossing back over the initial stitch, forming the complete cross.
Ensure each stitch leans consistently in the same direction for a uniform appearance. Maintaining even tension is crucial; too tight, and the fabric distorts, too loose, and the stitches appear sloppy. Practice makes perfect, building muscle memory for consistent, beautiful results.
Starting and Ending Threads
Securing your thread is vital for a lasting piece. Avoid knots! Instead, begin by stitching from the back of the fabric, leaving a short tail.
Weave this tail under several completed stitches on the reverse side to anchor it. When finishing a thread, similarly weave the tail under completed stitches, ensuring it’s securely hidden.
This method prevents unsightly knots and maintains a clean appearance. Don’t pull the thread too tightly when weaving, as this can distort the fabric. Proper thread management contributes significantly to a professional finish.
Maintaining Even Tension
Consistent tension is key to beautiful cross stitch. Too tight, and your fabric will pucker; too loose, and stitches will appear sloppy.
Aim for stitches that are neither overly snug nor excessively relaxed. A good test is to ensure the fabric lies flat without distortion.
Practice makes perfect! Focus on applying gentle, uniform pressure as you form each stitch. Avoid yanking the thread. Even tension creates a neat, professional look, enhancing the overall quality of your finished counted cross stitch project.
Advanced Cross Stitch Techniques
Elevate your skills with half stitches, quarter stitches, and decorative French knots. Backstitch and other embellishments add texture and detail to designs.
Half Stitch and Quarter Stitch
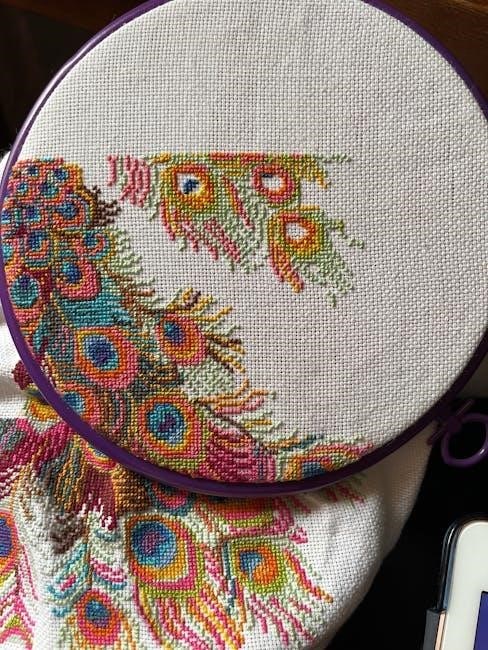
Half stitches, also known as half crosses, are precisely what they sound like – incomplete cross stitches, creating shading and subtle details within your designs. They’re often used to soften edges or suggest form where a full cross stitch would appear too bold.
Quarter stitches take this a step further, representing only one leg of the cross stitch. These tiny stitches are fantastic for adding incredibly fine detail and blending colors seamlessly. Mastering these techniques allows for nuanced shading and realistic textures, moving beyond the standard blocky appearance of full cross stitches. They require careful counting and precise placement for optimal effect.
Experimenting with these partial stitches unlocks a new level of artistry in your counted cross stitch projects.
French Knots
French knots are small, decorative knots used to add texture and dimension to counted cross stitch projects. They’re created by wrapping the thread around the needle multiple times and then inserting the needle back into the fabric very close to the original entry point.
Controlling the tension is key to creating neat, uniform knots. Too loose, and they’ll unravel; too tight, and they’ll distort the fabric. French knots are excellent for representing flower centers, eyes on animals, or simply adding a dotted effect.
Practice makes perfect – don’t be discouraged if your first attempts aren’t flawless!
Backstitch and Other Embellishments
Backstitch is a linear stitch used to outline shapes, add details, and define features within a counted cross stitch design. It’s worked by creating a stitch backward along a marked line, resulting in a solid, defined line.
Beyond backstitch, embellishments like seed beads, crewel embroidery, or goldwork can elevate your projects. These additions provide texture and visual interest. Consider using different thread types – silk or metallic – for a luxurious touch.
Experimenting with these techniques allows for personalized and unique creations!
Choosing Your Counted Cross Stitch Project
Selecting a project depends on skill level. Beginner patterns offer simple designs, while intermediate and complex patterns challenge experienced stitchers with intricate details.
Beginner-Friendly Patterns
Starting with simpler designs is crucial for new cross-stitchers. Look for patterns featuring a limited color palette – fewer colors mean less thread changing and a less overwhelming experience. Kits specifically labeled for beginners often include everything needed: Aida cloth, floss, a needle, and a clear chart.
Small, pre-printed patterns are also excellent choices, allowing you to practice basic stitches without a large time commitment. Designs with full stitches, avoiding fractional stitches like half or quarter stitches, are easier to master initially. Consider floral motifs, simple geometric shapes, or small animals as good starting points. Remember, patience and practice are key!
Intermediate Level Designs
Once comfortable with basic techniques, intermediate patterns introduce more complexity. These designs often incorporate a wider range of colors, requiring more frequent thread changes and careful floss management. Expect to encounter more detailed backgrounds and shading, demanding greater precision in stitch placement.
Fractional stitches – half and quarter stitches – become more prevalent, adding depth and realism to the design. Patterns may also include backstitching for outlining and defining details. Exploring designs like landscapes, portraits, or more intricate floral arrangements will challenge and refine your skills.
Complex and Challenging Patterns
For experienced stitchers, complex patterns offer a significant artistic undertaking. These designs frequently feature extensive color palettes, intricate shading, and highly detailed imagery. Expect numerous fractional stitches, blending techniques, and potentially, specialty stitches like French knots for added texture.
Large-scale projects, realistic portraits, or scenes with significant depth demand patience and meticulous attention to detail. Chart reading becomes crucial, as patterns are often densely packed with symbols. Successfully completing these projects provides a profound sense of accomplishment and showcases advanced stitching mastery.
Finding Counted Cross Stitch Patterns
Discovering patterns is easy! Explore online resources, books, and magazines for diverse designs. Publications from 1981 and 1986 offer unique stole and sampler patterns.
Online Pattern Resources
The internet provides a vast landscape for finding counted cross stitch patterns, catering to all skill levels and preferences. Numerous websites specialize in offering downloadable charts, often categorized by theme, complexity, and designer.
Many platforms feature free patterns, ideal for beginners or quick projects, while others offer premium designs for more intricate and detailed work. Online marketplaces connect stitchers with independent designers, showcasing unique and innovative creations.
Resources referencing patterns from 1981 and 1986 demonstrate the enduring appeal of classic designs, now often digitized and readily available. Social media groups and forums also serve as valuable hubs for sharing patterns and inspiration.
Cross Stitch Books and Magazines
Traditional resources like cross stitch books and magazines remain invaluable for counted cross stitch enthusiasts. Publications from as early as 1981, such as “Favorite Counted cross-stitch patterns and designs,” offer a wealth of charted designs and inspirational projects.
These printed materials often include detailed instructions, helpful tips, and variations on classic techniques. Books specializing in specific themes, like ecclesiastical embroidery (as seen in Wedge’s 1986 stole patterns), provide focused inspiration.
Magazines offer a continuous stream of new patterns and trends, keeping stitchers up-to-date with the latest designs and techniques.
Designing Your Own Patterns
Unleash your creativity by designing your own counted cross stitch patterns! While resources like the 1986 stole patterns and 1981 design collections offer inspiration, crafting unique designs is incredibly rewarding. Begin with simple images or motifs, then grid them onto graph paper mirroring your chosen fabric count.
Software programs simplify this process, allowing for easy color selection and pattern generation. Consider the limitations of the medium – detail is best achieved with higher fabric counts.
Experiment with different color palettes and stitch combinations to personalize your creations.
Counted Cross Stitch Fabrics
Various fabrics cater to different skill levels and project needs. Aida cloth, evenweave, and linen are popular choices, offering varied textures and stitch counts.
Aida Cloth
Aida cloth is arguably the most popular fabric for counted cross stitch, especially for beginners. Its easily identifiable, evenly spaced holes make stitch formation incredibly straightforward, eliminating guesswork and promoting consistent results.
The “count” of Aida refers to the number of squares per inch; common counts include 14, 16, and 18. Lower counts create larger stitches and a more open look, while higher counts yield smaller, more detailed designs.
Aida is typically made of cotton or a cotton blend, and is available in a wide array of colors, though white is the most frequently used. Its affordability and ease of use make it an excellent starting point for any cross-stitch enthusiast.
Evenweave Fabric
Evenweave fabric presents a more refined surface for counted cross stitch compared to Aida. Unlike Aida’s distinct holes, evenweave features a grid created by the interlacing of warp and weft threads, requiring stitchers to count the threads themselves.
This fabric, often made of cotton or linen, offers a smoother, more delicate appearance, ideal for intricate designs and realistic shading. Common counts range from 28 to 32, resulting in smaller, denser stitches.
Evenweave demands greater precision and is generally favored by experienced stitchers. It allows for fractional stitches and more complex techniques, enhancing the overall texture and detail of the finished piece.
Linen Fabric
Linen fabric, a classic choice for counted cross stitch, offers a beautiful, natural texture and a historical connection to the craft. Distinguished by its visible weave and slightly uneven threads, linen presents a unique challenge and reward for stitchers.
Counts typically range from 32 to 40, yielding very fine and detailed work. Linen requires careful counting and precise stitching to maintain an even appearance, making it suitable for experienced crafters.
Its inherent drape and subtle sheen enhance the finished piece, lending a timeless elegance. Linen is often preferred for heirloom projects and designs demanding a sophisticated aesthetic.
Counted Cross Stitch Threads
Embroidery floss, like DMC and Anchor, are popular choices. Silk threads offer a luxurious sheen, enhancing designs with vibrant color and texture.
DMC Embroidery Floss
DMC is arguably the most widely recognized and utilized embroidery floss globally, celebrated by cross-stitch enthusiasts for its exceptional quality and extensive color palette. This floss is composed of six easily separable strands, allowing stitchers to adjust the thickness of their lines.
For counted cross stitch, typically two or three strands are used, depending on the fabric count and desired stitch appearance. DMC floss is colorfast, meaning it resists fading with washing and exposure to light, ensuring your finished projects retain their vibrancy for years.
Its consistent quality and readily available nature make it a staple in countless cross-stitch projects, from simple beginner designs to intricate, complex patterns.
Anchor Embroidery Floss
Anchor embroidery floss presents a fantastic alternative to DMC, offering a similarly high-quality product with a slightly different sheen and color range. Like DMC, Anchor floss consists of six divisible strands, providing versatility in stitch thickness.
Many cross-stitchers appreciate Anchor’s vibrant and nuanced color selection, finding shades that perfectly complement their designs. It’s also known for its excellent colorfastness, ensuring longevity and preventing fading over time.
Anchor is a popular choice, particularly in Europe, and is readily available in a wide variety of shops and online retailers, making it a convenient option for all stitchers.
Silk Threads
Silk threads elevate counted cross stitch to a luxurious level, imparting a beautiful sheen and subtle texture unmatched by cotton floss. While more expensive than DMC or Anchor, silk offers a unique dimension to projects, particularly for heirloom pieces or designs requiring a sophisticated finish.
Silk threads are typically thinner than cotton, often requiring multiple strands to achieve desired coverage. They are delicate and require gentle handling to prevent fraying or breakage during stitching.
Using silk adds a touch of elegance and refinement, making it ideal for special projects where a premium look is desired.
Finishing Your Counted Cross Stitch Project
Final touches transform stitched pieces into treasured items! Washing, ironing, mounting, framing, or crafting pillows complete the process, preserving your beautiful work.
Washing and Ironing
Carefully washing your completed counted cross stitch project is crucial for maintaining its vibrancy and preventing damage. Gently hand wash the piece in cool water with a mild detergent, avoiding harsh chemicals or vigorous scrubbing. Rinse thoroughly until all soap residue is removed.
To dry, lay the piece flat on a clean towel, reshaping it as needed. Avoid direct sunlight or heat, as these can cause fading. Once almost dry, ironing can be done on a low setting, placing a clean cloth between the iron and the stitched fabric to protect the threads. This ensures a smooth, presentable finish, ready for framing or display.
Mounting and Framing
Proper mounting preserves your counted cross stitch artistry for years. Acid-free backing boards are essential to prevent discoloration and fabric degradation. Stretch the fabric tautly, securing it to the board with archival tape – avoid adhesives that could damage the threads.
Framing offers a polished presentation. Choose a frame that complements the design, ensuring the glass or acrylic protects the stitching from dust and handling. Consider a mat board to create visual space around the design. Professional framing services can provide expert mounting and preservation techniques, guaranteeing a lasting showcase for your work.
Creating Finished Items (Pillows, etc.)
Transform your stitched designs into functional and decorative items! Pillows are a popular choice; simply stitch a design onto fabric, then create a pillow back and sew the pieces together. Counted cross stitch can also embellish bags, ornaments, or even clothing.
Consider the fabric weight when choosing a project. Sturdier fabrics are ideal for items receiving frequent use. Backstitching around the edges of your design adds durability. Explore online resources for tutorials on specific finishing techniques, expanding your creative possibilities beyond traditional framing.
Troubleshooting Common Issues
Encountering knots or mistakes is normal! Gently address knots, and carefully unpick errors to maintain fabric integrity. Prevent distortion by consistent tension.
Dealing with Knots
Knots in your floss are a common frustration for cross stitchers, but thankfully, manageable! Prevention is key – use shorter lengths of thread, as longer strands tangle more easily. When a knot does appear, resist the urge to pull tightly!
Instead, gently try to coax the knot out with a needle or pin. If it’s stubborn, consider carefully cutting the thread close to the knot and re-threading your needle. Avoid excessive force, which can damage the fabric. Regularly check your work and address small tangles before they escalate into larger, more difficult knots.
Remember patience is vital; a little time spent untangling now saves significant headaches later!
Fixing Mistakes
Everyone makes mistakes in cross stitch! Don’t despair – they’re easily corrected. If you’ve stitched a color in the wrong place, carefully remove the offending stitches by snipping the thread close to the fabric. A seam ripper can be helpful, but use it cautiously to avoid damaging the material.
Re-stitch with the correct color, ensuring your tension remains consistent. For larger errors, consider carefully unpicking several stitches around the mistake to create a clean slate. Remember to re-secure your thread properly after making corrections.
Embrace imperfections as part of the learning process!
Preventing Fabric Distortion
Maintaining fabric shape is crucial for a neat finish. Avoid pulling stitches too tightly, as this can cause the fabric to pucker or distort. Use a hoop or frame to keep the fabric taut while stitching, but don’t over-tighten it. Regularly adjust the fabric within the hoop to distribute tension evenly.
When finishing your project, gentle washing and careful ironing are essential. Lay the piece flat to dry, avoiding stretching. Consider blocking the finished piece to restore its original shape if needed.
Proper handling ensures a professional look!
Counted Cross Stitch for Specific Items
Counted cross stitch beautifully adorns stoles, samplers, and gifts. Patterns from 1986 specifically detail stole designs, expanding creative possibilities for unique, handmade items.
Counted Cross Stitch Stoles
Counted cross stitch stoles represent a beautiful intersection of faith and artistry. Historical resources, like the 1986 publication by Wedge, Jeff, specifically focus on patterns designed for ecclesiastical use, particularly stoles.
These liturgical vestments offer a wonderful canvas for intricate designs, allowing stitchers to express creativity and devotion. Stoles can range from simple, elegant patterns to elaborate, symbolic representations.
Choosing appropriate fabrics, like linen or evenweave, and threads, such as DMC or silk, is crucial for achieving a refined and durable finish. Consider the liturgical season when selecting colors and motifs.
Counted Cross Stitch Samplers
Counted cross stitch samplers have historically served as showcases of skill and pattern collections. They represent a wonderful way for stitchers to practice techniques and experiment with different thread colors and fabric counts.
Samplers often include alphabets, numbers, borders, and small motifs, providing a comprehensive reference for future projects. They can be personalized with dates, names, or meaningful verses.
Creating a sampler allows for exploration of various stitches beyond the basic cross stitch, such as half stitches or backstitch. The finished sampler becomes a treasured heirloom, demonstrating dedication and artistry.
Counted Cross Stitch for Gifts
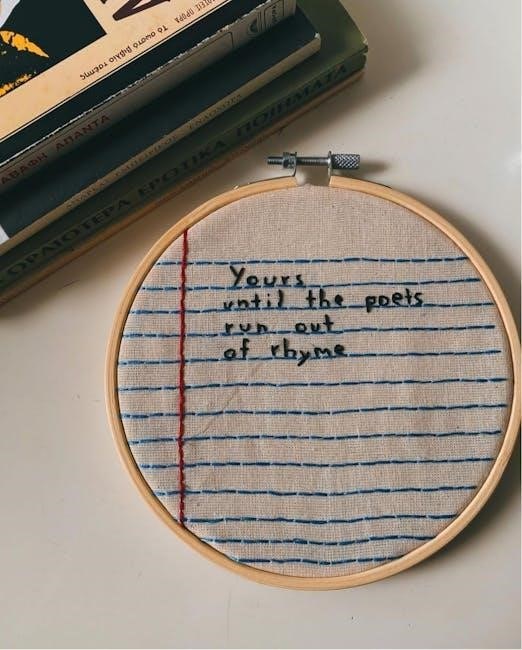
Counted cross stitch creates uniquely personalized and heartfelt gifts. From small ornaments to larger wall hangings, the possibilities are endless. Consider stitching initials, birthdates, or special quotes to make the gift truly one-of-a-kind.
Patterns readily available online and in books offer designs suitable for all skill levels. A stitched stole, as showcased in historical patterns, could be a meaningful gift for a religious occasion.
Finished pieces can be framed, incorporated into pillows, or transformed into other decorative items, adding a handmade touch to any occasion.